HDR or high dynamic range photo editing is something I have been trying for sometime and was not very successful. Major reasons are my laziness to carry around a tripod and lack of knowledge or patience to tone-mapping (conversion of HDR image to Low dynamic range image by selecting a suitable set of tones). Additionally, Qtpfsgui, the free and opensource HDR and tone-mapping software, did not remove ghosting satisfactory. So, a leaf moving in the exposure bracketed shots screwed up the HDR output. It is tough to get bracketed images without any movement between shots when the subject is landscape, major HDR subject. So, it had not been a good experience for me.
Then, I read about getting more dynamic range out of a single RAW shot using the HDR workflow at multiple photography blogs, websites and mags. I decided to try it out.
I visited Yosemite National Park last year in July. It was a cloudy and rainy day. The view made famous by the legendary photographer Ansel Adams was in front of me. The inspiration point near the tunnel. Took more than 100 snaps with different camera settings, framing, angles. Selected the below picture as the guinea pig for my HDR experiment.

This image captures the valley against the rock formations. The half dome is covered in clouds and the water falls is leaving a mist over the trees. But, it lacks contrast.
STEP 1: This was shot in RAW format using a Canon Rebel XTi (aka 400D). The first step was to convert this into multiple JPEG images using a RAW processing software applying different exposure settings.

Used ufraw and gimp to make these images from the RAW file. I did not do any editing in Gimp. Just saved whatever ufraw exported to Gimp after applying the exposure changes.
STEP 2: Open the exposure modified images in an HDR program. I used the free and opensource Qtpfsgui. This is based on PFS tools. Even though, I generated a exposore-2 image, I did not use for the final image creation as it caused too much noise in the tone-mapped image. Qtpfsgui did not detect the exposure corrections that I did in ufraw. So, the corrections needed to be keyed in.

As all these images are generated from a single RAW file, aligning and de-ghosting are not required. So, I pressed next.

Did not play around much in this window and pressed next. Selected the default profile in the next window and proceeded. This generated a HDR image.

STEP 3: Time for tone-mapping the HDR image. Qtpfsgui has various operators/algorithms for tone-mapping. Unfortunately, those operators and their parameters are named very cryptically. The user needs to experiment to see which one produces the desired output.

I liked the output of one of the algorithms better than the others after a bit of experimentation. “Mantiuk” operator with slightly increased saturation gave me best results (this may be specific to this picture). The cloud formation came out well without losing details on rocks and the trees with those options and the output did not have an overcooked feel too.

STEP 4: Saved this tone-mapped image as jpeg and exited Qtpfsgui. Even though, I was satisfied with the increased dynamic range in the image, the saturation and contrast was not upto the mark. Those were not tweaked in the HDR program. I thought, familiar photo-editors like GIMP or Lightroom would be better to do that job. I did the following adjustments in Lightroom to enhance the image
- Increased the contrast a little
- Increased the vibrance/saturation
- Reduced the noise in the cloud area
- Increased the brightness/exposure of the trees
Below is the final image after all the editing.
Flickr page : http://www.flickr.com/photos/kdinuraj/4545866193/
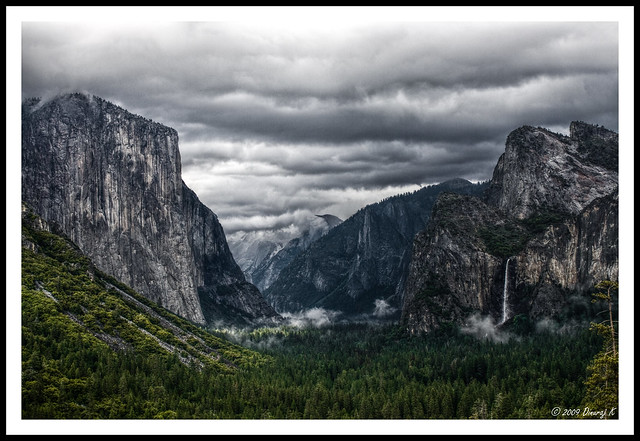
Compared to the image that I started with, this is a major improvement. I am not sure, if I could have achieved similar results with a non-hdr process.
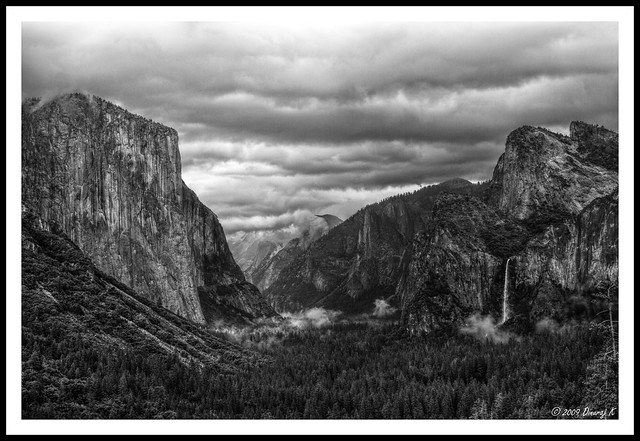
Black and white version of this image is
Flickr page: http://www.flickr.com/photos/kdinuraj/4545898659/
I felt good about the result and so decided to document it in this blog. Hope to try similar processing on other images too. Will share if I get good results.


